Physical Address
304 North Cardinal St.
Dorchester Center, MA 02124
Physical Address
304 North Cardinal St.
Dorchester Center, MA 02124

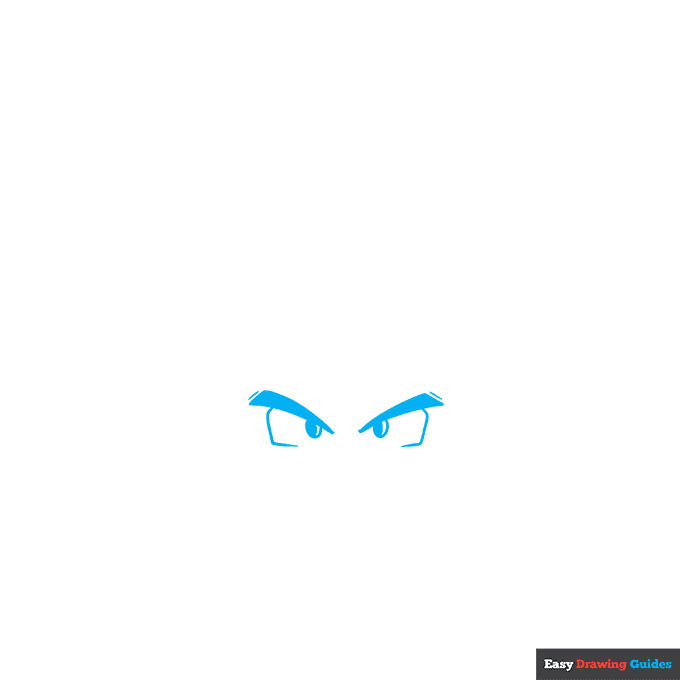
1. Begin the Goku cartoon by drawing his eyes. Shade two narrow triangles to form the eyebrows. Draw a short line behind each, and use straight lines to partially outline the rectangular eyes.
Enclose a partial oval in each eye. Draw a line across each oval, and shade the larger portion to indicate the pupil.
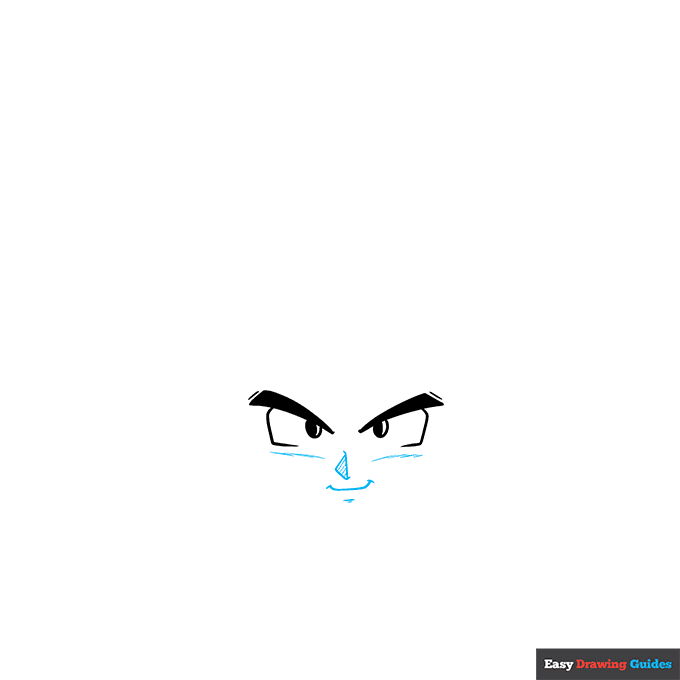
2. Contour the cheeks with a hatch pattern of short lines. For the nose, draw a triangle, and shade it by drawing diagonal lines across it. Use curved lines for the mouth and the dimple of the chin.
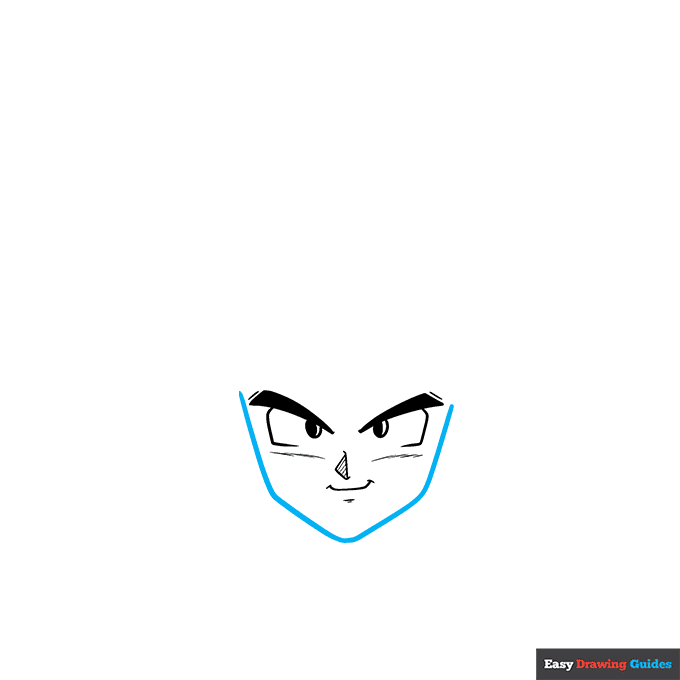
3. Use a curved line to trace the “V” shaped chin and the sides of the face.
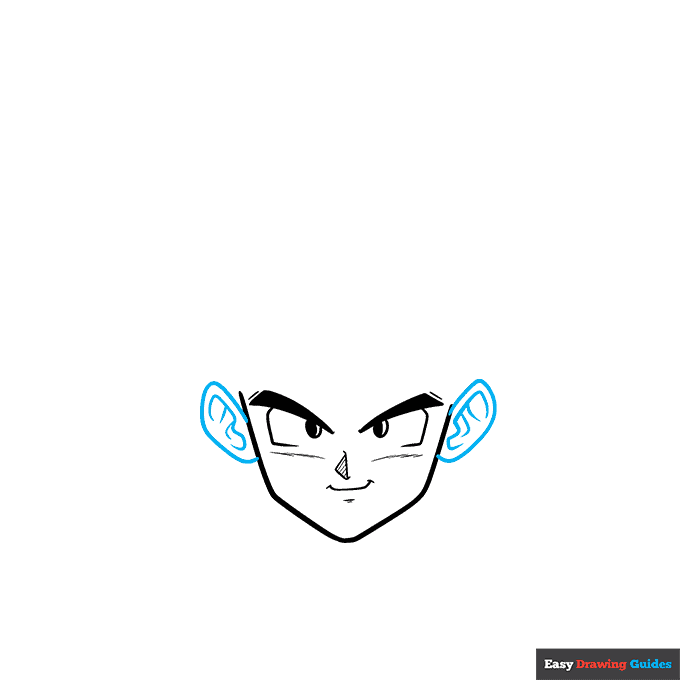
4. Use curved lines to enclose Goku’s ears and to contour inside them.
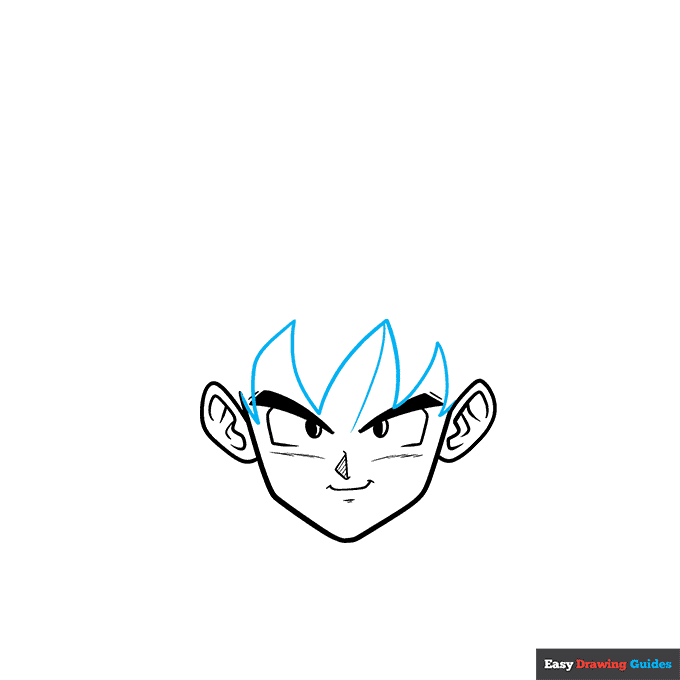
5. Begin drawing Goku’s spiky hair. Use curved lines that meet at jagged points.
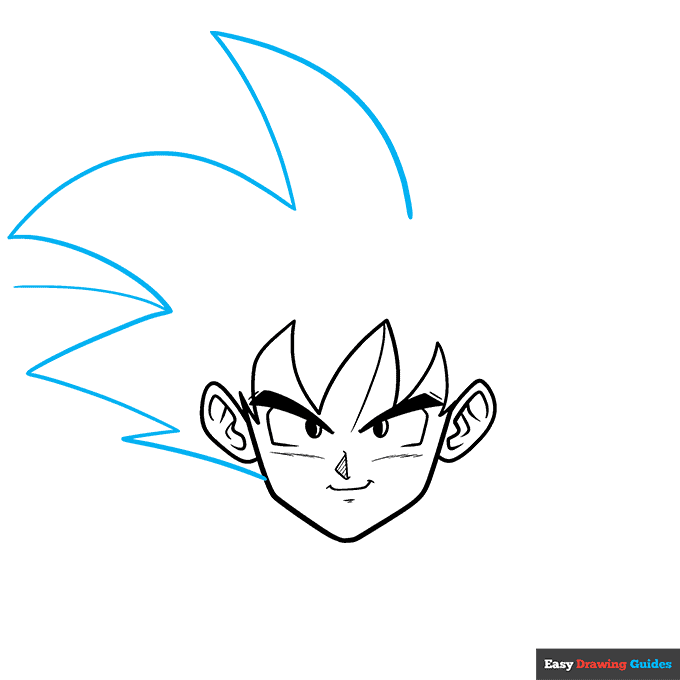
6. Continue to draw the unruly hair. Use long curved lines that meet at jagged points, as well as a few single lines.

7. Continue using long lines that meet at jagged points to draw the hair. At this point, the hairstyle should be fully enclosed.
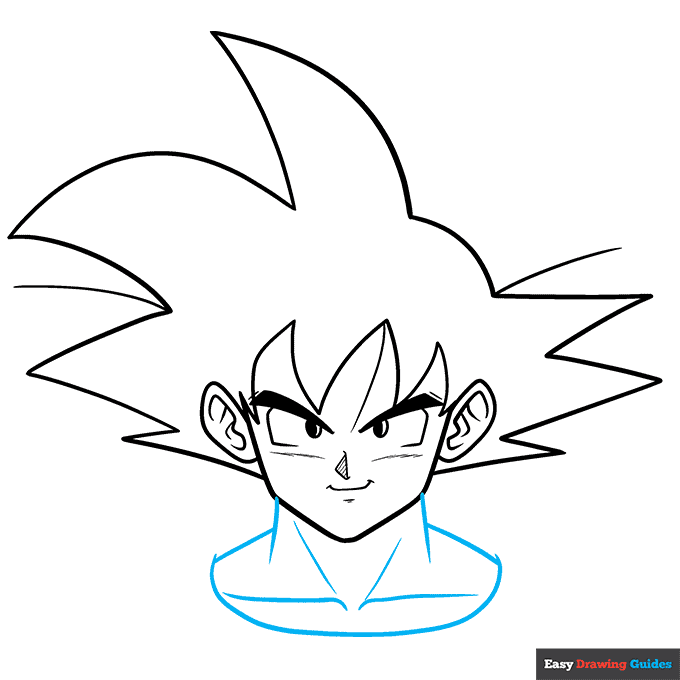
8. Extend a pair of lines below the head to form the neck. From these, extend another pair of lines to form the shoulder.
Connect these with a wide “U” shaped line, forming the neck of the tunic. Contour Goku’s neck and collar bones with curved lines.
Complete the Outline of Your Goku Drawing – Step 9
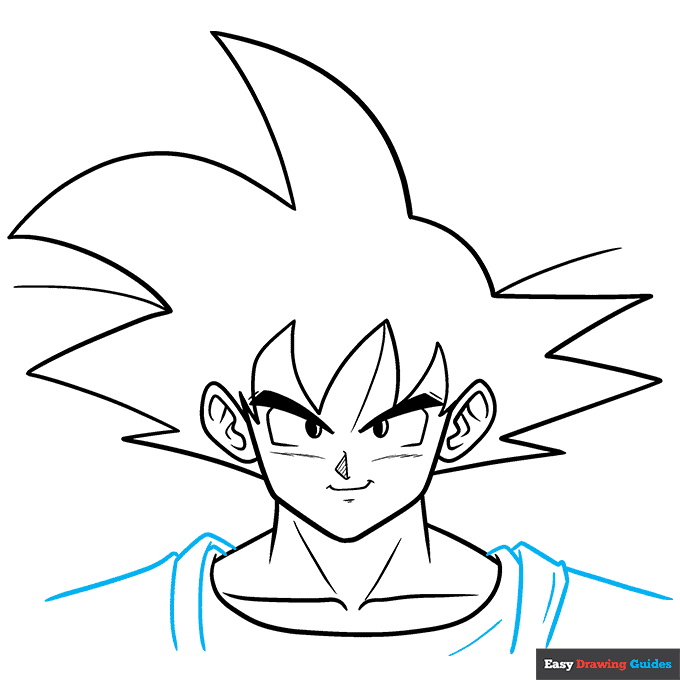
9. Use overlapping curved lines to draw the layers of Goku’s garments and to contour the folds of the fabric.
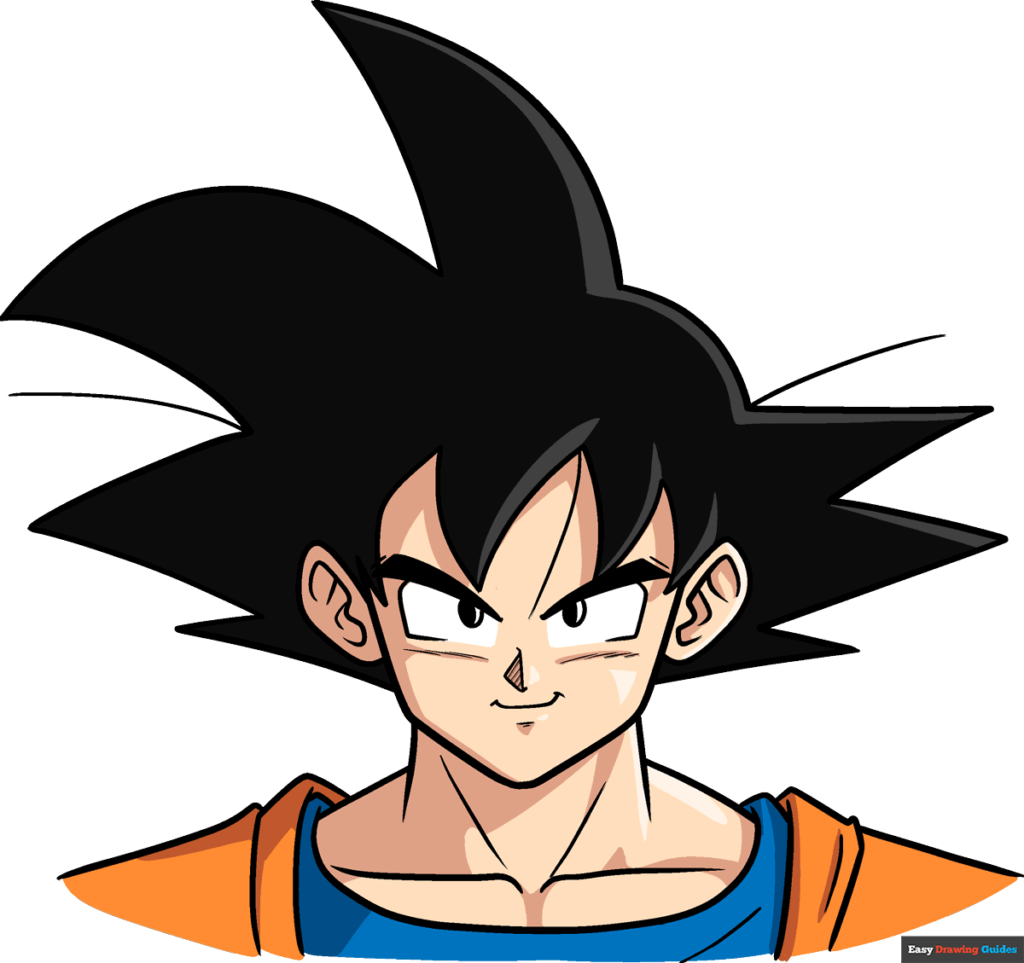
Color Your Goku Drawing
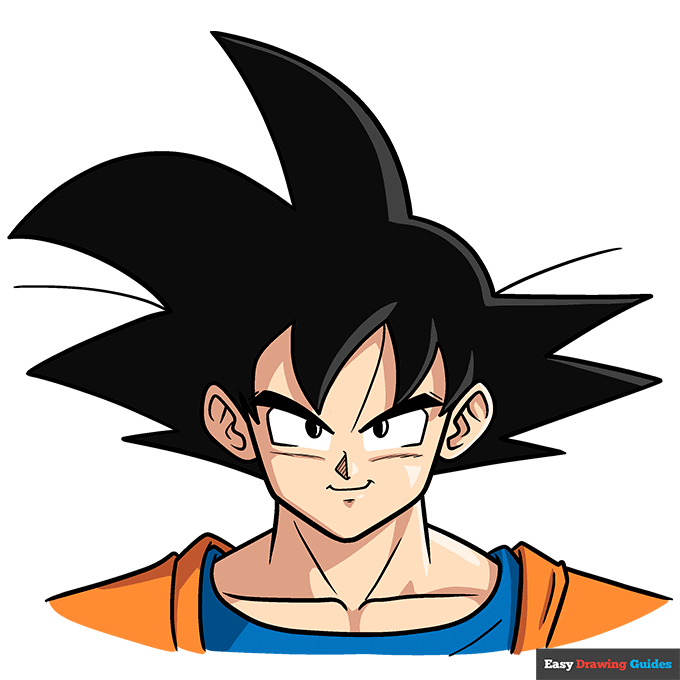
Your iconic Goku outline is now complete. Color your famous anime character. Goku has black hair. He wears a blue inner tunic and an orange outer tunic.